Thursday, December 29, 2011

I got a new camera!

Ryan got me a Canon Rebel T3i for Christmas and I am in love! My man is so good to me. It's amazing how much better the photographs look with this camera. I now find myself wanting to take my camera with me everywhere I go (you never know when there's gonna be a photo op).

Around here it's tradition, the day after Christmas, for all the guys to go duck hunting up on our friend's ranch. So of course, I brought my camera. I wanted to play with my new toy. The ladies, the babes, and the dogs all decided to go for a walk around the ranch. We were on the hunt for "diamonds." Mostly quartz hidden among the rocks around the ranch, although diamonds have been found and mined in the little town of Cherokee. Real or not, it's fun for the little girls (and the big girls, I got into it).

Here's a few pics from that day. Now don't go judging the photos too harshly. I'm still learning.


My friend Karla's daughter, Donna. Even if the camera wasn't pointed directly at her, I could hear her saying "cheeeeeeese."


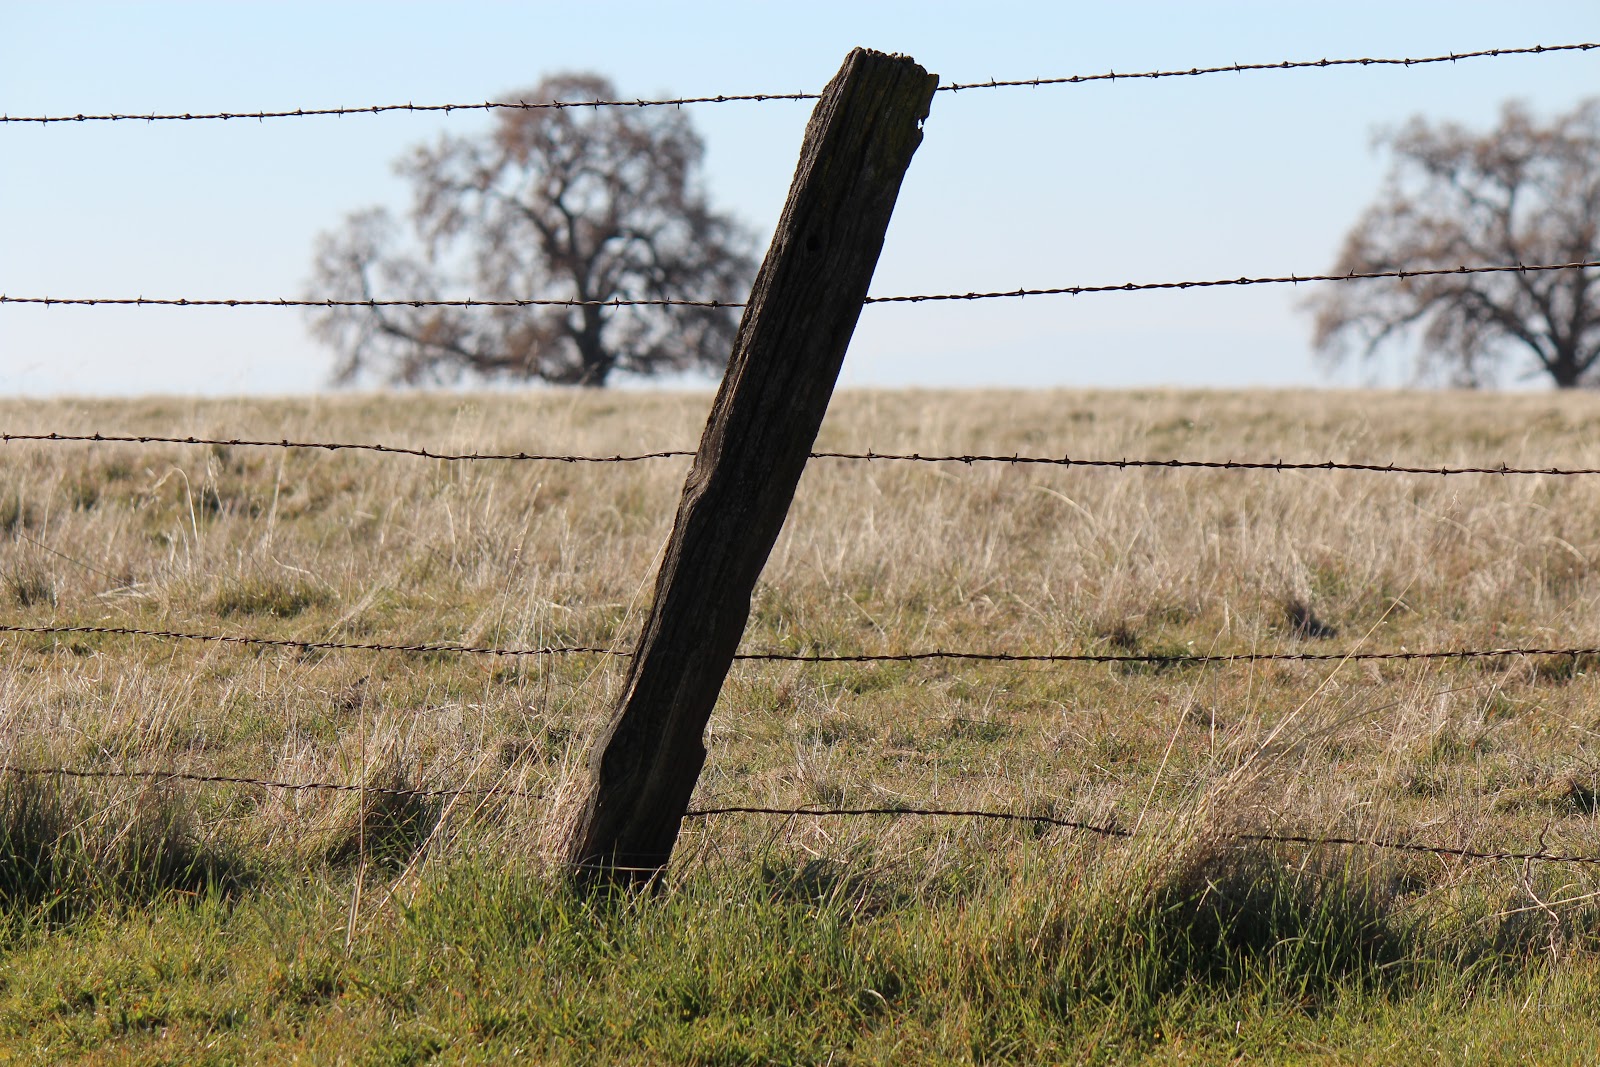
December 26 and the skies are clear and crystal blue. What a beautiful day!


Karla and her son, Jake. I adore this photo.


The birds hoard their acorns in the bark of the trees. Storing up for winter I guess. Those suckers are really wedged in there; it's impossible to get them out!

Friday, December 23, 2011

Sexy Laughs for Crafty Ladies

Do you ever come across something that's so totally off the wall, but completely amazing? Something that doesn't serve a practical purpose, but makes your day that much better? Cue Handmade Ryan Gosling.


Have you seen those cheesy books in Barnes and Noble called Porn for Women? They're filled with pictures of sexy lumberjack men (mostly clothed) ironing clothes and doing the dishes while telling you how beautiful you are. Well this site is that, but for crafty chicks. Hilarious, sexy, purely awesome. If your day needs a pick-me-up, go check out all of the submissions.

Here are some of my favorites:


Merry Christmas to all of you crafty folks out there! And if you're like me and finishing up handmade gifts the day before Christmas Eve, good luck!

Thanks Handmade Ryan Gosling for making me laugh and for making me feel better about my crafting woes!

Thursday, December 15, 2011

5 Days of Felt : Snowy Trees

I'm sorry I've been slacking on posting for the 5 Days of Felt. I have multiple felt projects started, but none finished. I also have my hands in about 10 different handmade gifts for Christmas. Sometimes I look around and think How am I going to get this all done? But as a lifelong procrastinator, I'm sure I'll pull it out. Last minute, that's just how I function.


Sometimes crafty ideas don't turn out quite the way you hope. I had high hopes for these snowy trees. They ended up looking not-so-fabulous. I spent way too long trying to make the tops of the trees look right and they still look funny. But I'm going to share them with you all anyway. Day 3 of 5 Days of Felt : snowy white felt trees.


I started with styrofoam cones. I bought the green cones since they were on sale (the white cones, of course, were not). I first covered the cones with a layer of white felt so that the green wouldn't show through.


Next, I cut strips of felt about 2 inches wide and then cut a scalloped edge into each strip. 


I ran glue and sprinkled glitter along the curved edges. You can kind of see the glitter below. It makes it look like freshly fallen snow.


After hot gluing all of the strips to the cone, the last step is making a top for the tree. Mine look weird, I hope yours will look better.


Day One: Ruffly Rosette Wreath
Day Two: Felt Gift Bows

Monday, December 12, 2011

DIY Vintage Dictionary Flowers


I bought a dictionary from the '50s at the flea market for $3. I bought it with the intent to rip out the pages. Some of you might think that's a crime, and normally I would feel bad about ripping up a book, especially a really old book, but the binding was falling apart and I already have more dictionaries than I need. So I decided to show it a little love and give it new life as these beautiful origami flowers.


I found the tutorial for these flowers over at Folding Trees.


A bonus when making these flowers, you learn new words or come across definitions that are just plain funny (at least to me).

winker n. 1. one who or that which winks 2. Colloq. an eyelash or an eye
(who refers to an eyelash as a winker? "Ouch, I have a winker in my eye!")

fop n. a man who is excessively concerned about his manners and appearance
(Was this the 50's version of a man who's "metro" ?)

foppery n. the manners, actions, dress of a fop

......................................................................................................................................

Now here's my attempt at an origami photo tutorial. I'll try to explain the steps, but if you just follow the pictures you should be good. All of the steps and folds may seem daunting, but once you get the hang of it, it goes fairly quickly.


Start with a book page cut down to a 5" square. 


Bring two corners together to form a triangle. Bring the bottom right corner up to the top corner.


Now bring the left corner up to the top corner, which will leave you with a small diamond.

Friday, December 9, 2011

Old Windows Make It Snow

I bought these old windows at a local garage sale. I wasn't sure what I wanted to do with them right away, but I had to have them. When December rolled around I had a vision of a white Christmas. Unfortunately, I now live in Northern California. Chances of snow in my backyard...slim (unless I want to throw my butt in the car and drive up to the mountains). So to bring a little bit of that snowy feeling to my home, I decided to put my window finds to use.


I had the vision and my super stud executed it, while I was getting ready to prepare a "breakfast for dinner" feast for our friends. All that is needed is two distressed windows, some fishing line, a few small nails, and sparkly snowflake ornaments in various sizes (we got ours 4 for $1 at Target). Hammer the nails into the top of the window frame, every few inches (on the side that will be against the wall). Tie strings of fishing line to each snowflake, then hang at varied lengths on the nails. Finish by hanging windows on the wall. Let it snow, let it snow, let it snow.


Unfortunately, we are renting so we can't paint the walls. But just imagine how amazing the snowflakes would look on a wall painted something other than off-white: charcoal, teal, espresso, red...I could go on and on. When I find time, I will definitely be painting the frames a better color to pop off of the white walls, because white with white on white = no bueno.

Thursday, December 8, 2011

5 Days of Felt : Felt Gift Bows

It's Day Two of 5 Days of Felt and today I want to share how to make reusable felt bows. The beauty of these little guys is that they can't get crushed in the car, on the way to family gatherings, like paper bows do. And they cost around 50 cents each! These were inspired by How About Orange's magazine bow tutorial.


What you'll need :
   - 9"x12" sheets of felt
   - ruler
   - scissors or rotary cutter
   - hot glue gun and glue

Sunday, December 4, 2011

5 Days of Felt : Ruffly Rosette Wreath

Ever since I made the felt dress up dolls, I have been so excited about felt! I hadn't used felt since I was a kid, but lately I've been searching for more adult ways to use it. With all of these great ideas, I've decided to do 5 Days of Felt. I can't promise that they will be five consecutive days, but there will be five days with five fun ways to use felt.

To kick off 5 Days of Felt, I'm sharing this ruffly rosette wreath that I made for my sister's house. I came across the tutorial for the rosette wreath at Domestifluff awhile ago and had been wanting to try it. I also wanted to decorate my sister's house for Christmas since my little nephew had just been born and she was a little busy with the whole newborn thing.

Please forgive the car seat backdrop. My car was the only place with good light. This is the wreath in route to my sister's house. You might be thinking pink?, that's not a traditional Christmas color. But my sister = not so traditional, just one of the many reasons I love her!


Now let me show you how to make it. You'll need: 
  - 12" styrofoam wreath
  - about 2 yards felt (maybe a little less)
  - a box of 200 straight pins
  - 3" circle template
  - pen

The first step is to cut a 3" circle template from some cardstock. Then get to tracing! I started with the 9"x12" sheets of felt. I could fit 10 circles on one sheet. I ended up running out of sheets of felt so I headed back to the store and then bought a yard of felt in the same color. That's why I'm not sure exactly how much felt you need total. I do however know that I cut out 168 circles. That's right, I counted. I only   covered the front and sides of the wreath so that it would lay flush with the wall. If you want to cover the back of the wreath as well, you will definitely need more circles.


Once you have the circles cut out (that is the most time consuming part), it's time to start covering your wreath with ruffles. Take each circle, fold it in half and then half again. Push a straight pin through the bottom corner.


LinkWithin

Related Posts Plugin for WordPress, Blogger...